Exporting CSP reports from OCULUS Pentacam
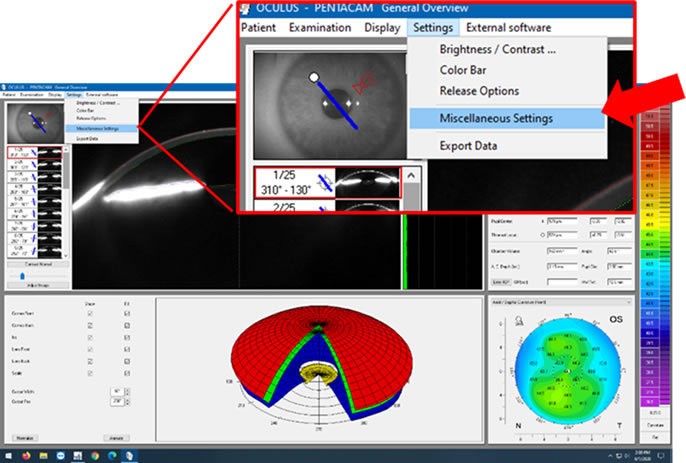
PERFORMING CSP SCAN Perform CSP 5x50 Picture/2 secs scan in following sequence: 1. Central 2. Nasal *This is typically the most difficult scan, and for narrow fissures may not get an “Accepted” scan message. You may have to settle for a “Advised Repeat Scan” (Yellow) as compared to a “Repeat Scan” (Red). 3. Temporal 4. Superior 5. Inferior Important Tips: • To get good coverage hold upper and lower lids for superior and inferior scans respectively, and possibly both for central, nasal, and temporal scans • To get good quality images keep overhead lighting to a minimum EXPORTING CSP DATA STEP 1: SET UP DATA EXPORT LOCATION a. Select Settings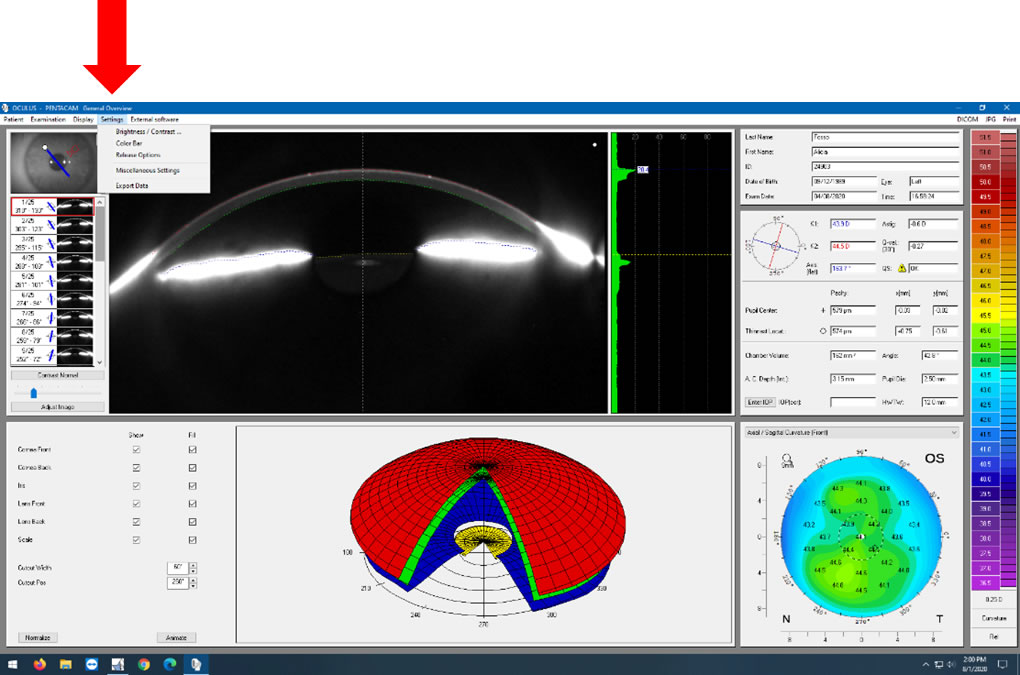 b. Select Miscellaneous Settings
 c. Select the “Export” Tab
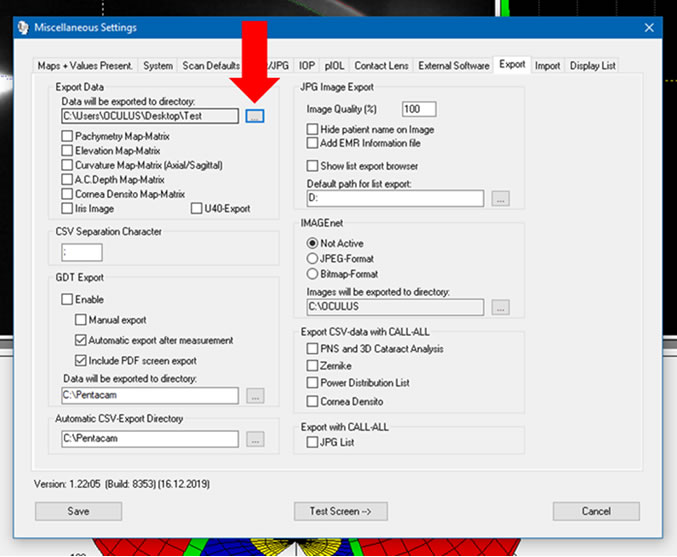
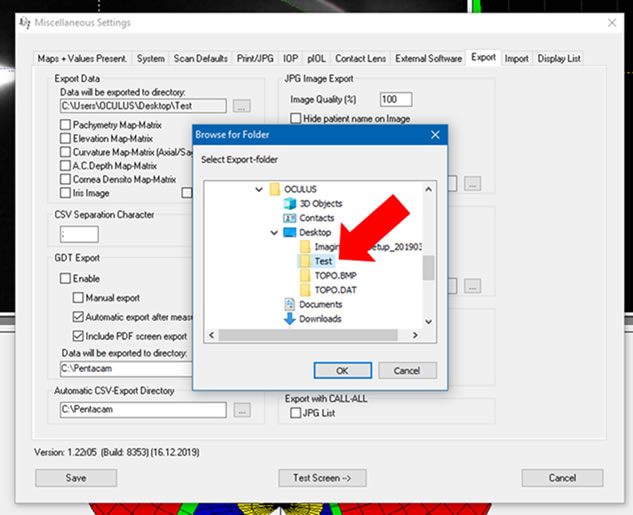
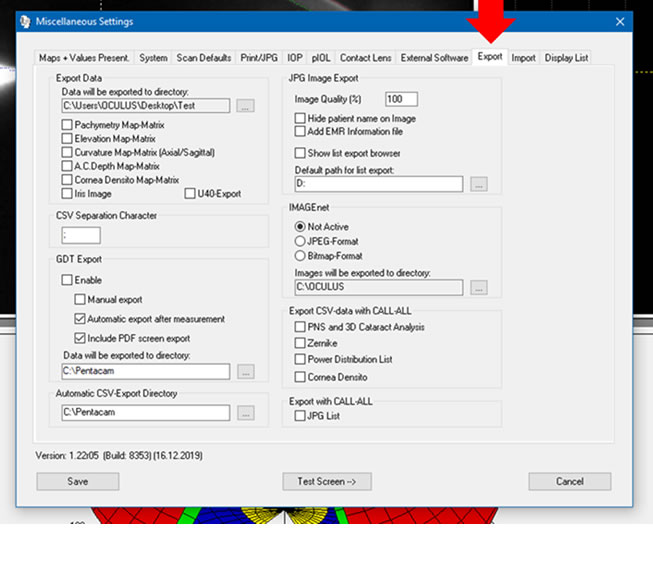 d. Under the “Export Data” Section, click the “…” box to search for the desired save location.
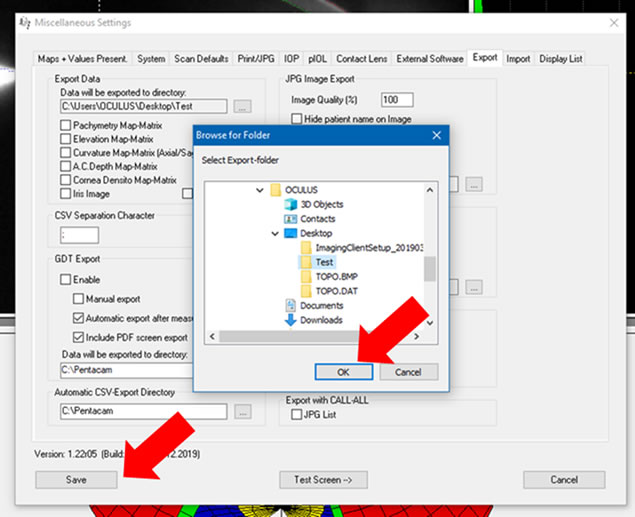
 e. In our case we created a “Test” folder on the desktop that the data gets saved into.
 f. Click “OK” and then “Save”
 STEP 2: SAVING THE DATA
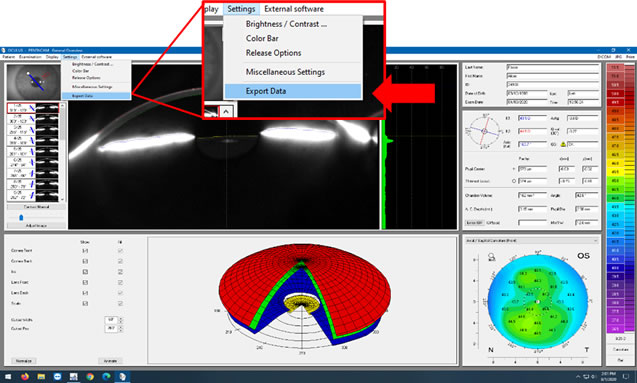
a. Load the wanted CSP 5x50 scan data
b. Select “Settings” and click “Export Data”
STEP 2: SAVING THE DATA
a. Load the wanted CSP 5x50 scan data
b. Select “Settings” and click “Export Data”
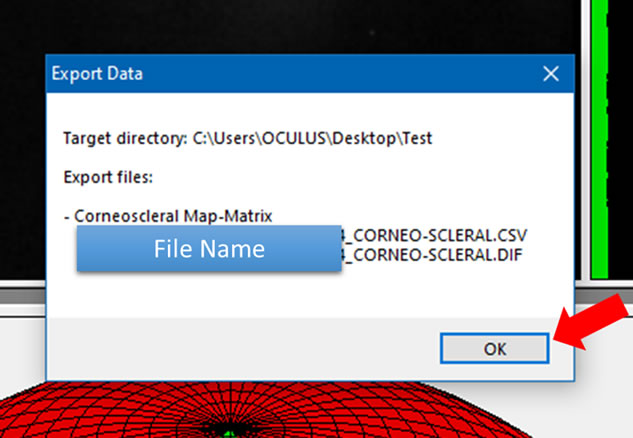
 c. The data will then export and save to the folder you selected. Click “OK”
 Gaudi software imports the “.csv” file to design a hypergeometric lens.
Instructions kindly prepared by Dr. Trevor Fosso
PineCone Vision Center, Sartell, MN
Gaudi software imports the “.csv” file to design a hypergeometric lens.
Instructions kindly prepared by Dr. Trevor Fosso
PineCone Vision Center, Sartell, MN
PERFORMING CSP SCAN Perform CSP 5x50 Picture/2 secs scan in following sequence: 1. Central 2. Nasal *This is typically the most difficult scan, and for narrow fissures may not get an “Accepted” scan message. You may have to settle for a “Advised Repeat Scan” (Yellow) as compared to a “Repeat Scan” (Red). 3. Temporal 4. Superior 5. Inferior Important Tips: • To get good coverage hold upper and lower lids for superior and inferior scans respectively, and possibly both for central, nasal, and temporal scans • To get good quality images keep overhead lighting to a minimum EXPORTING CSP DATA STEP 1: SET UP DATA EXPORT LOCATION a. Select Settings
b. Select Miscellaneous Settings
c. Select the “Export” Tab
d. Under the “Export Data” Section, click the “…” box to search for the desired save location.
e. In our case we created a “Test” folder on the desktop that the data gets saved into.
f. Click “OK” and then “Save”
STEP 2: SAVING THE DATA
a. Load the wanted CSP 5x50 scan data
b. Select “Settings” and click “Export Data”
c. The data will then export and save to the folder you selected. Click “OK”
Gaudi software imports the “.csv” file to design a hypergeometric lens.
Instructions kindly prepared by Dr. Trevor Fosso
PineCone Vision Center, Sartell, MN